
OmniPoint Best Practices, a three-part series.
- Part 1: Scoping the Job Site
- Part 2: Account Pre-Installation Onboarding
- Part 3: Installation Day (this page)
What this video covers
Step 1: mount the Gateway, antennas before power
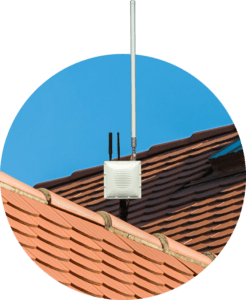
Install the Gateway first. It is typically placed at the center of the property at the highest point possible, the placement you settled during scoping. Use the OmniPoint Gateway Install Guide to fix the mounting bracket to the back of the Gateway and secure it to its pole or surface.
One sequence matters and is easy to get backwards: attach the antennas first, then connect power. Gateways come in wired internet and cellular LTE versions, so the exact connections differ, but antennas-before-power holds for both. And every Gateway, indoor or outdoor, must be grounded to protect against power surges; see the install guide or ask CellGate technical support.
Step 2: power on and confirm it is online
Once antennas and ground are set, power on the Gateway and confirm it is working before you touch a single entry point. Look for the online indicator, either on the Gateway itself or in the CG Installer Control app. Give it a few minutes; the first online indicator can take several minutes to appear. Do not move on until it is confirmed online, because everything downstream depends on it.
Step 3: wire the first entry point module
Go to the first entrance and wire its EPM. Start by connecting the main power wire, the 12 volt DC, to the back of the EPM. Then wire the wet relay to the door strike or contact. This is the local wiring OmniPoint still needs at each opening, power, lock, and reader; the long data run back to the Gateway is what the LoRa radio replaces.
Step 4: register the EPM in the app

With the EPM wired, the CG Installer Control app prompts you to register it. Select Scan Node Barcode and scan the module, which ties this physical EPM to the account and, using the property map from onboarding, to its location on the property. Repeat the wire-and-register cycle for each remaining entry point. When the last EPM is registered and online, the OmniPoint system is live.