
OmniPoint Best Practices, a three-part series.
- Part 1: Scoping the Job Site (this page)
- Part 2: Account Pre-Installation Onboarding
- Part 3: Installation Day
Who this is for. Sales engineers, sales teams, dealers, and property managers scoping an OmniPoint job before an order goes in. It walks the site walk from pre-visit prep through the finished checklist. This is Part 1 of three; Part 2 is account pre-installation onboarding and Part 3 is installation day.
What this video covers
Why scoping decides the order
OmniPoint is a wireless multi-point access control solution. A Gateway talks to CellGate’s TrueCloud Connect platform over cellular LTE or wired internet, and communicates locally with up to one hundred entry point modules over long-range LoRa radio, out to about a mile with line of sight not required. That wireless link is what removes the trenching and long data runs a wired system needs.
Because the modules reach the Gateway by radio rather than wire, the whole order depends on one thing you can only learn on site: whether the signal holds at every opening. Scoping is how you find out before you have bought anything.
1) Place the Gateway: high, central, then choose the data path
Begin by determining the best placement for the OmniPoint Gateway. In most cases that is the middle of the property at the highest point possible relative to building height, because that geometry is what lets the Gateway hear every entry point module.
Once placement is decided, choose how the Gateway sends data to the TrueCloud Connect platform: cellular LTE on AT&T or Verizon, or a wired internet connection.
- If cellular LTE, run a signal test to confirm a reliable signal for the chosen carrier. Contact CellGate technical support if you need assistance.
- If wired internet, confirm the connection is stable by speaking with the network provider or the customer’s IT support.
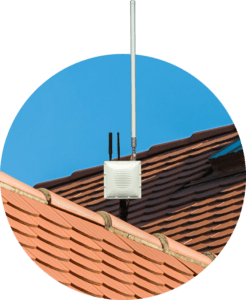
When a LoRa signal test is required
A LoRa signal test should be conducted on site with an OmniPoint Test Kit if any of these are true:
- The Gateway range approaches or may exceed half a mile.
- The Gateway cannot be placed as high as or higher than the tallest building it needs to cover.
- There is any concern about the range from the Gateway to the entry point modules because of building type or construction.
In other words, whenever distance, height, or the buildings themselves put the radio link in doubt, prove it rather than assume it.
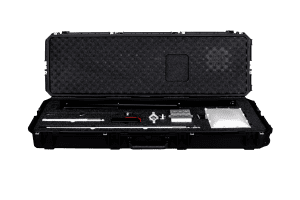
Getting a Test Kit
OmniPoint Test Kits are available for purchase from CellGate. If you do not have one, contact your local distributor, or a CellGate Regional Sales Manager or Business Development Manager to learn about the Test Kit rebate program.
The kit ships with instructions for performing the signal test itself, so the walk below assumes you have it in hand.
2) Walk every entry point: test the signal at each one
Identify every entrance where an entry point module will be installed. Walk the site with the Test Kit and test the signal strength at each one against the chosen Gateway location.
One case is easy to get wrong: for a pre-wired location where the module will not sit at or near the entrance, test the module where it will actually be installed, not where the door is. The reading only counts from the module’s real home.
Build the EPM checklist, by entrance
As you walk, create an EPM checklist entrance by entrance, recording the hardware each entry point needs:
- The entry point name or location.
- Whether an internal or external antenna version EPM is needed.
- The Wiegand device and credential type, and the type of lock.
- The available power source. It must be 12 to 24 volts, AC or DC, and compatible with both the Wiegand reader and the lock.
The gaps you leave here are the change orders you write later.
Place the order
Once you have gathered every entrance’s hardware requirements, you have everything you need to place an accurate OmniPoint product order. Thorough documentation on the walk is the difference between a smooth install and a return trip, and dealers can reach CellGate technical support at any stage for help with a marginal reading or a power question.
With the site scoped and the order placed, the next step is account pre-installation onboarding.